
Pre-build: components, tools, and fit
Confirm fit, tools, and required parts before assembly starts. Make sure your gauntlet has the needed clearance, your tools are ready, and your parts plan is clear before anything is wired or installed.
Prep
Whistling Birds Gauntlet Darts
Screen-accurate arming and disarming. Simulated firing with customizable RGB colors. Synchronized dart deployment triggered by gesture — just like the weapon from The Mandalorian and The Book of Boba Fett.

Screen research
Gear-driven articulating darts, 12 addressable RGB LEDs, magnetic arming, and gesture-triggered synchronized deployment. Each scene showing the Whistling Birds was studied for deployment sequence, dart timing, LED behavior, and firing geometry. The mechanism and light effects in this build mirror what appears on screen.
Before you build
Choose the build path that matches your tools and experience. The full DIY build involves small electronics, soldering, and 3D printed parts; the assembled option arrives ready for gauntlet installation.
The tools-and-materials list ensures you’re prepared to start: confirm gauntlet fit, gather the recommended tools, and walk through the parts and materials so the build runs cleanly from the first solder joint to final fit-up.
The kit is designed to fit into existing finished gauntlets, but some shells may still need light internal modification for the module and dart tips to move smoothly. Installation is much easier when the top shell can be opened, but sealed-top gauntlets can still work as long as the internal opening remains fully open and can accept the tips cleanly.
Before you begin, confirm:
Compatible gauntlets (100% scale or larger): Chamanleon FX, Galactic Armory, Great Ape.
Choose your build path
Start with the digital files and build from scratch, add the components you want prepared for you, or choose a fully assembled module ready for installation. Every path leads to the same finished prop — DIY builders follow the assembly stages below, while assembled kits go directly to the shared Installation Guide.
Check your gauntlet first. It needs a clear opening inside of 100 × 33 mm (3.9 × 1.3 in). That one measurement does not guarantee a fit. See the full fit drawing.
Pick a kit to see your price.
You pay to ship your gauntlet to us
Battery not included. You will need a 3.7V battery with the right plug. Some batteries are wired backwards and can damage the board.
Made to Order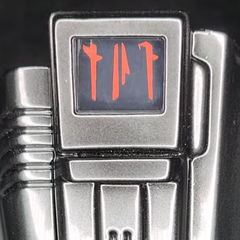
Added — the Mandoputer ships alongside your module. Go to cart
Pickup currently not available
Assembly Instructions
Confirm fit, tools, and required parts before assembly starts. Make sure your gauntlet has the needed clearance, your tools are ready, and your parts plan is clear before anything is wired or installed.
Prep
Build and verify the electronics before they go into the module. Power, LEDs, speaker, and reed switch are tested first so the core system is working before mechanical assembly begins.
Electronics
Build and tune the gearbox. Install the servo, gears, and electronics, then time the push arms so every row extends and retracts cleanly without binding.
Mechanical
Create the twelve Fiber Optic Beskar Darts on the bench. Cut and straighten the fibers, shape each dart point, and glue the Beskar tips in place. The darts remain long for final sizing during installation.
Finishing
Fit the completed components to your gauntlet: install the mounts, size the darts, position the reed switch and magnet, and verify final movement. This installation guide is shared by DIY builds and Complete Kits.
InstallReplica prop — not a toy
This build kit is intended for cosplay and display use by builders 14+ with adult supervision during assembly.
Assembly involves soldering, sharp mechanical components, rare-earth magnets, and testing live electronics.
This product is not a weapon and is not designed to fire projectiles. It is not suitable for unsupervised use by children.
After installation
The owner’s manual for the Whistling Birds prop. Covers the daily power-arm-fire sequence, gesture controls, configuration mode, demo mode, troubleshooting, and safety.
OperateInstall or update the firmware, configure settings in config.py on the CIRCUITPY drive, and verify a clean boot. Come here when a new version is released or when you want to change settings.
SoftwareSee what changed between hardware and firmware revisions before you update or rebuild. Use this to check part revisions, gear-setting changes, and any required software follow-up.
UpdatesStart with the most common fixes before taking anything apart. Support begins with symptom-first checks for fit, power, servo motion, and LEDs so most issues can be resolved quickly.
Support